Simple Carpentry with My Boys

My boys love to build things. What boys don’t? So when I can think of something useful for them to build, we’re all happy. It gives them a great opportunity to develop hand-eye coordination as well as some math skills (measuring). You know me, I’m always happy to find ways to teach school subjects with real life. They get permission to bang on something. That always brings smiles! And it gives them a nice sense of accomplishment when it’s finished. So here is a project that I did with my boys recently.

I didn’t like the way they just piled things up on the floor of their closet, so I decided that if they built a rack to put in their closet, they would get all of the great benefits of building, plus they would be so proud that they would determine to keep the bottom of their closet nice and clean. It worked!! Yea! Score!

We measured their closet, then we went to Home Depot and figured out what would work and purchased a kit. Building with them is fine and all, but I did not want to have to get out a saw to complete the project, so I limited our choices to kits.

Here’s a before picture of the closet.

The closet before

Here are some work in progress pictures.

JD Boy (age 7) screwing the case together

G'tums (age 4) screwing

JD Boy (age 7) screwing the case together

G'tums (age 4) pounding with a rubber mallet

And here’s the completed project.

The closet after

The closet after

They’re quite proud of their work. They’ve faithfully been lining up the their shoes and toys in there now. They have even been keeping their closet floor vacuumed now. It might not make it into Better Homes and Gardens best organized closet, but I’m thrilled with and so are they. Just think of all that we got accomplished with that task.

Kindergarten/1st Grade Math Lapbook

We have been having way too much fun with math around here. That’s a good sign, because math is supposed to be the most boring subject of all. My kids have had so much fun learning math without a textbook. I wish I would have done this sooner.

Let me tell you why I didn’t. I was afraid. Even though I’ve had plenty of exposure to homeschooling in my life–my husband was homeschooled, I have siblings that were homeschooled–still doing it on my own was scarier than I thought. So if you’re thinking that your too scared to try this approach to math, I don’t blame you, but keep it in the back of your mind if you have a child that hates math.

Every day I like Math on the Level more and more. The whole idea of not having a textbook for the kids is actually liberating. I have come to realize that Math on the Level will always require lots of parent time, but it’s fun time. I enjoy putting together the lesson plans and playing math with my kids. Best of all my kids are loving math, the same two kids who last year would whine and whine when I told them to get their math done. And my three-year-old loves it when the older two are doing things for math, because he can get his hands in on the action often too.

Okay, now to the lapbook since that’s my heading! Lapbooks are not part of the Math on the Level program, but as you might already know, they’ve become a fun part of our homeschooling experience and since Math on the Level is about teaching concepts, not about doing pages of math, I am free to teach the concepts multiple ways. So this week, I had my son review several of the things he had covered last year by making a lapbook. This lapbook evolved a little bit, because my original idea was to make what some call a mini-office so we started out making a few of the mini books on the computer. Then I thought better of the situation. I thought, "What is the sense of my making this lapbook for him to look at? This should be his project and then making it will be reinforcing it in his mind." So a few of the components were from the original concept and then the rest are his creation. (Some with my assistance.)

Here are the pictures.

Math Lapbook Cover

The cover.

Math Lapbook Open

The lapbook opened up.

Left panel is a slider to practice counting backwards from twenty. The top middle is his handwritten hundreds chart. The bottom is a seven-inch ruler. The hands on the clock rotate and so he (or I) can set the time on the clock and then read it. I uploaded the template for the clock and you can download for free at hslaunch by clicking here. I’ve also uploaded the template for the Counting Backwards slider.

Here are close-ups of the other two mini-books in the above picture.

Place Value Open

A close-up of the inside of the Place Value Layered Book.

Denominations of US Dollars

A close up of the Bills Book. I downloaded the artwork for most of the bills from a US Treasury website. I got the $1 bill from Wikipedia.

Math Lapbook Fully Open

The lapbook opened up further.

Math Lapbook Top Flap

The top flap.

The hands are quite obviously about learning left and right. Yes, they were traced from his hands. The "Numbers about Me" are interesting numbers that he had to figure out such as weight, height, clothing size, birthday, his age, etc. Inside the house is his address and phone number. I’m not going to show the insides of these two for what I think is an obvious reason.

Math Lapbook Inside

The inside of the inside of the lapbook. Close-ups following.

Spelling Numbers

Learning to spell the number names.

Coins Tabbed Book Open

Inside of the Coins tabbed book. (I got the artwork for the coins from the US Mint. It’s really nice artwork. Some of the coins on the front were stickers though.)

Shapes Layered Book Open

Some 2-D shapes.

You can probably tell which mini books he made and which ones I made. I just happen to think that his are way neater than mine. (You’re on your own now for making your own lapbooks, my boy!)


Kitchen Math

Well, we finally officially started back to school on Tuesday. We had a fun and full week.

One of the new things we are trying this year is a new math program, called Math on the Level. It is a very unique math program which I am quite excited about, partly because the editor of it is an electrical engineer (like me!) This program is set up in such a way to help parents (or teachers, but it is written for homeschoolers) teach math without workbooks. The reason that I was attracted to this program is that my son declared last year that he hated math, but in a different conversation, he told me that he spends his time in the shower figuring out different kinds of math problems. I started quizzing him and realized that his math skills had surpassed his textbook significantly. Before I even heard of Math on the Level, I put away his math book and I just printed off a scope and sequence from the internet and started teaching him the concepts on my own. I had intended to keep that up until I found Math on the Level. But I really love it when somebody has invented the wheel before me. This program has a very systematic way of recording so that you can keep track of the areas in math that your child(ren) need to work on. It has several books to teach from: Geometry, Operations, Activities, and Money. There might be more. My only concern with this program over a textbook math program is how parent intensive it will be. Math was the one subject last year that I told my kids to do and I went and made lunch, but this requires my time too, at least right now. Perhaps, once the kids and I understand the program better, it will become a bit more independent.

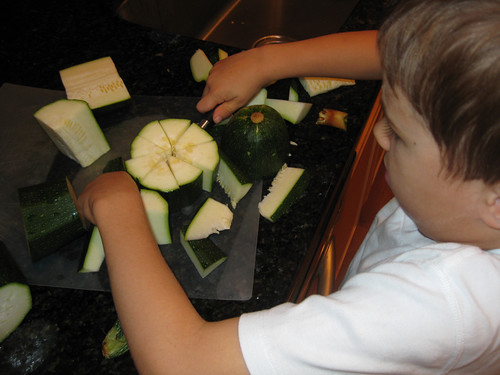
So what did we do for math this week? Well, my first grader needed to learn the definition and measurements for volume. My fourth grader needs to work on her multiplication and she needed to learn the difference between the English and Metric systems. So we went out to the garden and picked this:

Zuchini from the garden

That is one very overgrown zucchini. Not all of them we pick are this big, but the ones that are get turned into zucchini bread.

Then we chopped this zucchini into all kinds of fractions to run it through the food processor and we practiced our addition and subtraction of fractions with our mammoth zucchini.

Cutting the Zucchini into fractions

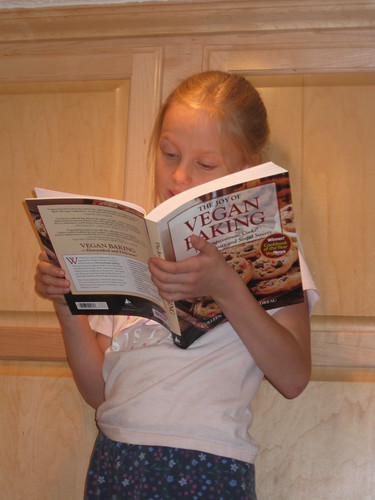
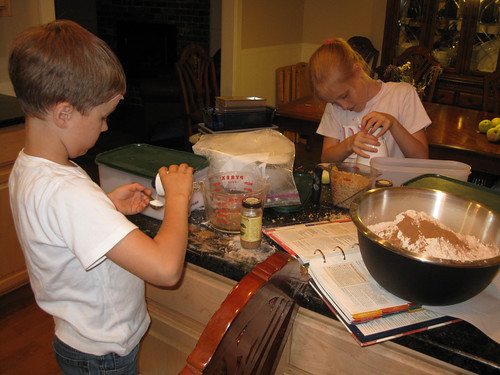
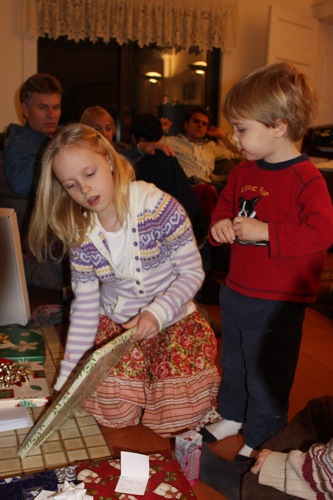
After we had it run through the food processor, we had eight cups of zucchini, which translated to eight recipes of zucchini bread. So my daughter got out the recipe book and started her calculations.

Kitchen math class

I’m not quite sure why, and not sure if you can tell, but she felt that the best place to work on this math, was standing on the counter. I promise she didn’t get that idea from me. I have never stood on the counter to look at recipe books.

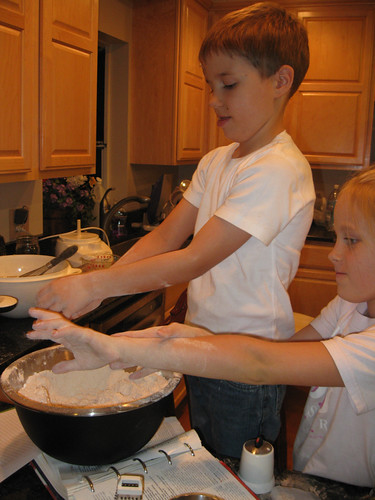
Then the kids set out to measure and measure. JD Boy learned the difference between tablespoons and teaspoons and Zippy learned the difference between cups and milliliters.

Learning Volume Measurement the Messy Way

And, if you couldn’t already tell from that picture, they made a mess. I took on the job of cleaning the whole time they were cooking (and answering questions). I probably should have taken a picture of how high and carefully I had dishes stacked in the drying rack by the time they were finished. That was my math lesson for the evening: how many layers of dishes can be stacked in a drying rack at once.

Messy Math

I’m ashamed to say that I did not take pictures of the bread after it got out of the oven. Everybody else was in bed when it was finally done baking and I was a bit anxious to get there myself. But, they must have done their math well, because the zucchini bread was delicious and we ate the whole lot of it up before the week was over (and before I got the battery on my camera recharged.) I had planned to freeze it, but we ate it. So I guess, we’d better head back out to the garden and see if there are any more over grown zucchini.

So did I need Math on the Level to turn this into a math lesson? No. I had already discovered that the kitchen is the yummiest and messiest place for math class. We are however, excited, to try a new approach where we learn math with real stuff. Even my fourth grader will be doing minimal written work with this program. She will mostly be doing hands-on activities to learn her math. I hope to one day soon give a more thorough review of the program, but after the zucchini-bread math class, my kids are totally sold on the program, at least for the time being.

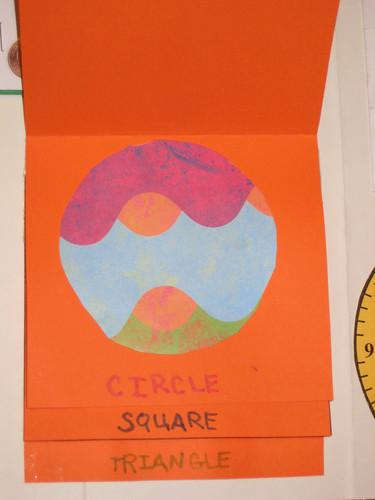
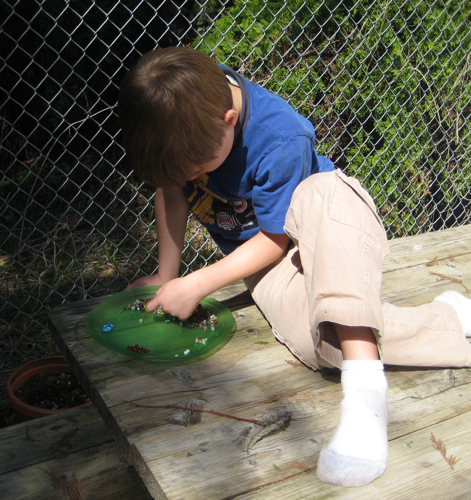
We also did some geometry this week and even my preschooler thought that was fun. One of the neat things about this program, is that it gives you lots of ideas for teaching multiple ages. So you can teach names of 3-D objects to one age, while at the same time, you’re teaching something more technical about the 3-D objects to the older students. One lesson plan, but multiple levels at once, makes for a less stressed mama.

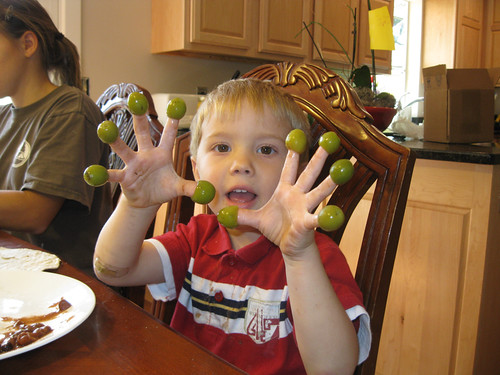
Last but not least, I have to share one more little math lesson that my preschooler did this week all on his own. I didn’t prompt him to do this at all. I don’t think kids usually need prompted for this math lesson, but it is the best lesson we’ve found around our house to teach the one-to-one relationship to preschoolers.

G'tums learning one-to-one ratio with olives

Yep! Olives on the fingers! He counted out his olives and put them on his plate before he put them on his fingers and he got it right. I just watched the whole process and didn’t say a word, well that is, except, "Can I take your picture?"

Now, I’m getting hungry. Guess it’s time to work on some more lesson planning for math class!

Old Fashioned Money–Beads

We recently had lots of fun tying math in with our history lesson. It came at just the right time for us too, because two oldest kids were tired of their math books and I was looking for some ways to use some things around the house to teach math concepts and give them a bit of a break from the pencil and paper math books. Then while we were going through our Hands and Hearts kit on early American life, we found a whole section in the manual about how beads were used for trading with the Indians. It told which colors were more valuable. So we set out to do some monetary math with beads.

JD Boy just separated his according to color and counted how many of each color that he had. It was actually quite a tedious job.

JD Boy sorting beads

Zippy sorted hers according to color, then wrote down how many she had of each color and then looked in the guide that was in our kit for how to calculate the value of her beads. I can’t remember what each bead was worth. I just remember that blue beads were the most valuable.

Zippy Counting & Sorting Beeds

Even G’tums wanted to join in, so we pulled out some plastic beads out of our craft box and let him sort by colors. But unfortunately I don’t have a picture of that.

What fun we had! As you can see, we were also enjoying our math/history lesson outside. Ah, bliss! Wish we could do that everyday.

Eventually we’ll turn these beads into crafts, but it couldn’t have been more fun to turn a history lesson into a math lesson. For once my daughter thought math was actually fun. Now I’m off to find some more fun ways of teaching math.

Economic Christmas

If you had the chance to look under our tree this year, you would have been concerned for the retailers in America. There were fewer and smaller presents. Parents and grandparents alike took the economic situation into consideration when doing their shopping. Just as I suspected though, the kids were just as thrilled with their presents as if they had cost ten times as much.

Here are a few pictures of my kids with their Christmas presents.

New book and pencils.

Zippy with Christmas presents

New watch and puzzles.

JDBoy with new watch

New tractor and puzzles.

G'tums with Christmas presents

New bicycle helmets.

New bicycle helmets

Children love surprises. They love expensive surprises and they love cheap surprises. They love full-price surprises and they love marked-down surprises. They just love surprises and that’s what makes Christmas so special.

As you may know, the best surprise for our children this year was a puppy. I’ve already posted about her, but here’s another picture of our adorable little Sadie.

JDboy and Sadie